This post explains how to set Android Studio so that when you press CTRL + S
to save the code, code reformatting will also be run automatically.
I find myself constantly hitting CTRL + S when I’m writing, so for me this
was the easiest way to make sure the code reformatting was constantly being run.
The code reformatting feature can also be applied from the version control commit menu from within Android Studio.
Reformatting Tasks
The reformatting tasks that will be run and what each of them do are explained below
Auto-Indent Lines
Changes the indentation of all selected lines so they are at the same as the code style settings. All lines to run this on must be selected in the file.
Optimize Imports
Removes any imports that aren’t being used and sorts them based on the import sorting rules.
Reformat Code
Will run both the auto-indent lines and optimize import tasks. When it runs the auto-indent task it does not require that code be selected.
Save All
Saves all files, this will be used as part of the macro to still provide the save functionality when overwriting the keymapping.
How to setup the auto formatting macro
In order to perform the auto formatting along with keeping the save
functionality on CTRL + S a macro is the best bet, the macros in Android
Studio can allow for running multiple tasks from one button press so we will be
doing that.
The explanation on how to do this is written for Windows, but will work for MacOS as well if the shortcuts are replaced for the MacOS equivalent.
To access the macros go the “Edit” -> “Macros”, here you can choose to start, stop, or edit the macros.
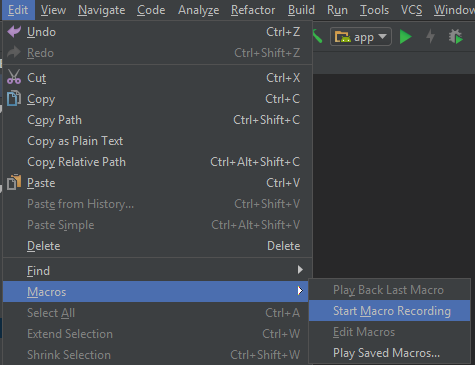
Pressing on the “Start Macro Recording” as shown above will begin the macro recording process. Any tasks that are now executed will become a part of the macro, so ensure that only the tasks you want are used. While the macro is recording there will be a little pop up window in the bottom right to show you this.

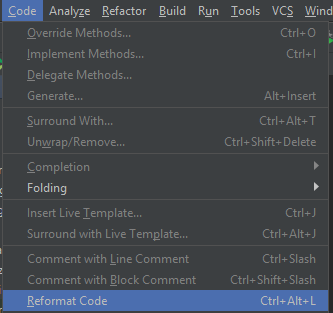
For our macro we need to run both the “Reformat Code” and the “Save All” tasks.
Reformat code can be found under “Code” -> “Reformat Code”, alternatively
pressing CTRL + ALT + L will perform the task.
If there is currently no file open, the dialog will be opened instead, its
recommended to have a file open in the IDE so the command just runs instead.
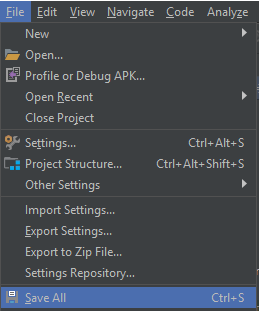
Save all can be found under “File” -> “Save All”, alternatively pressing
CTRL + S will perform the task.
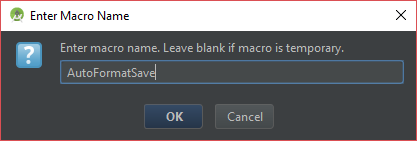
Finally return to the macro menu and end the recording, this will bring a prompt up to give the macro a name.
How to assign the macro
To use the macro we will be assigning it a keystroke, since we have the
functionality for save built into it, we will overwrite the CTRL + S key
mapping.
Go to your Android Studio settings, and to the “Keymap” section, this will
allow us to assign our own keymaps.

In the keymap settings, open the Macros section and right/double click the
macro that was created earlier. From here assign to the keyboard shortcut
CTRL + S.
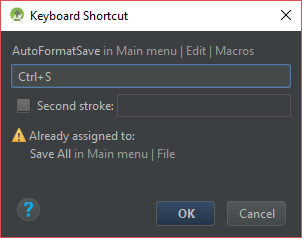
Ignore the warning and press ok, this will bring up a warning about the shortcut already being assigned, we can safely click “Remove” since our macro is doing the same functionality.

Now the macro has been assigned. When you hit CTRL + S now, save will perform
as normal, and code formatting will also be applied.
TL;DR
Edit -> Macros -> Start Macro Recording
CTRL + ALT + L
CTRL + S
Edit -> Macros -> Stop Macro Recording
File -> Settings -> Keymap -> Macros
Assign to CTRL + S